Transaction Type
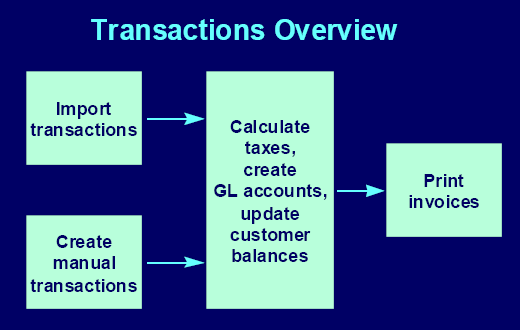
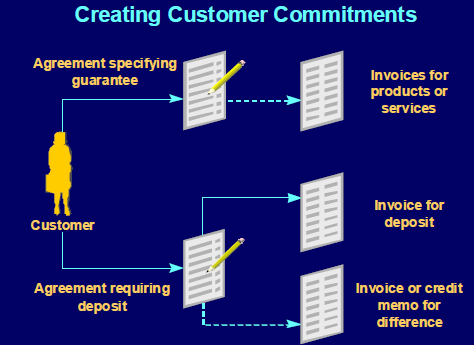
Use transaction types to define the accounting for the invoices, debit memos, credit memos, commitments(Guarnatee, Deposit), chargebacks, on–account credits, and bills receivable you create in Receivables.
Transaction types also determine whether your transaction entries update your customers’ balances and whether Receivables posts these transactions to your general ledger.
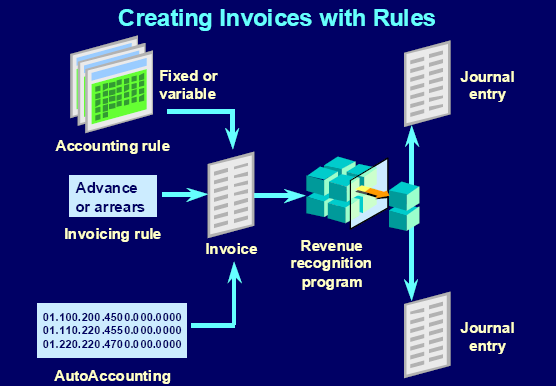
1. If AutoAccounting depends on transaction type, Receivables uses the general ledger accounts that you enter here, along with your AutoAccounting rules, to determine the default revenue, receivable, freight, tax, unearned revenue, unbilled receivable, finance charges, and AutoInvoice clearing accounts for transactions you create using this type.
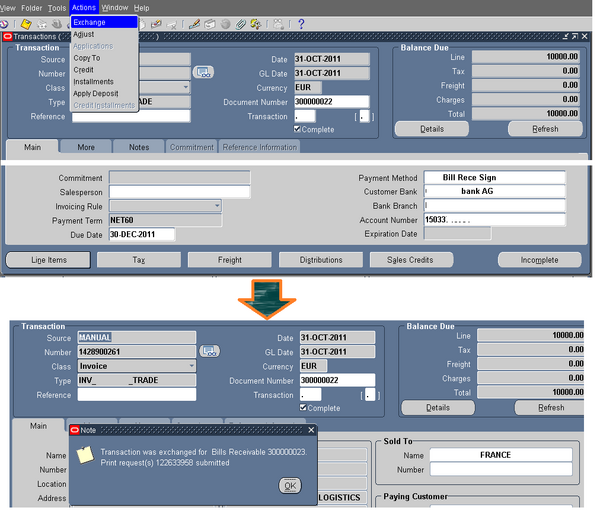
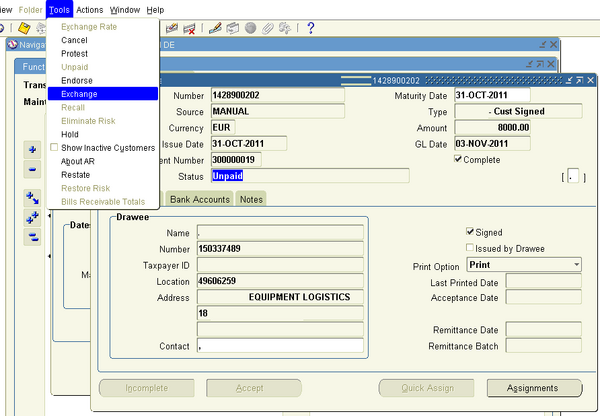
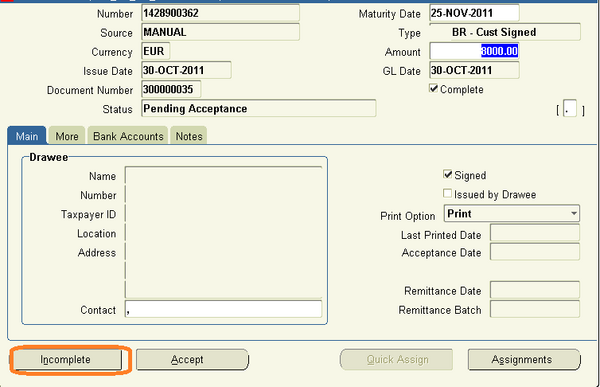
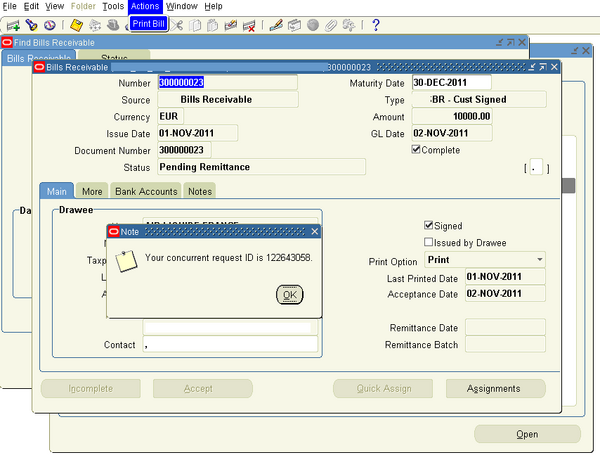
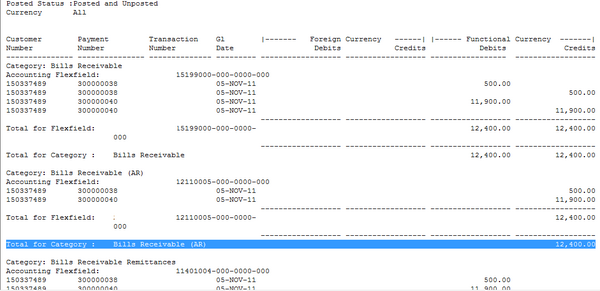
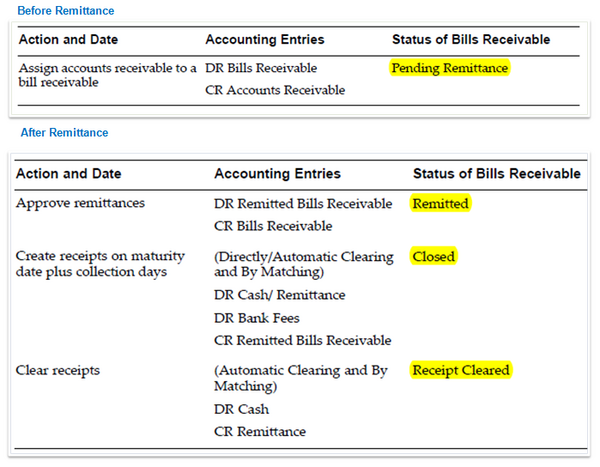
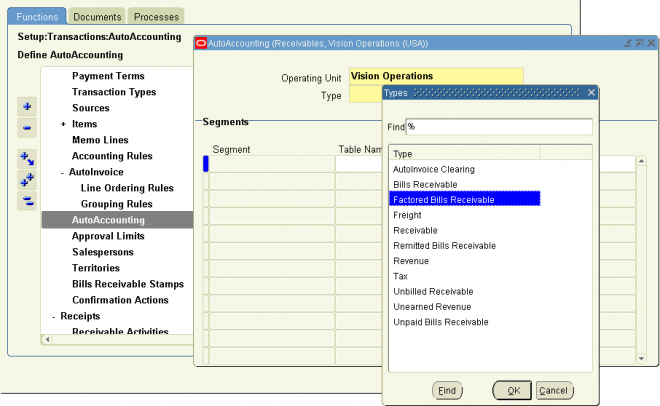
2. For bills receivable, the accounts that you enter here determine the bills receivable, unpaid bills receivable, remitted bills receivable, and factored bills receivable accounts for a bill receivable.
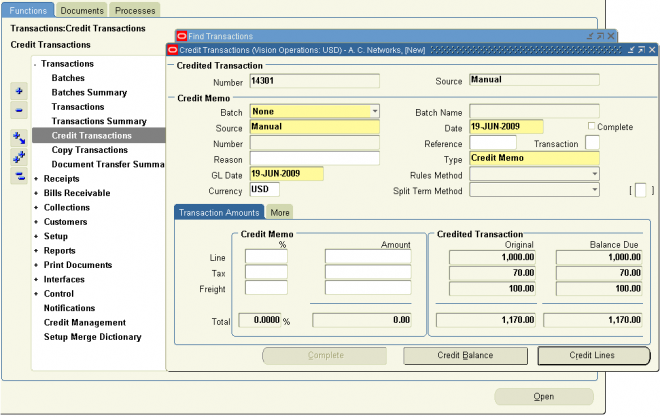
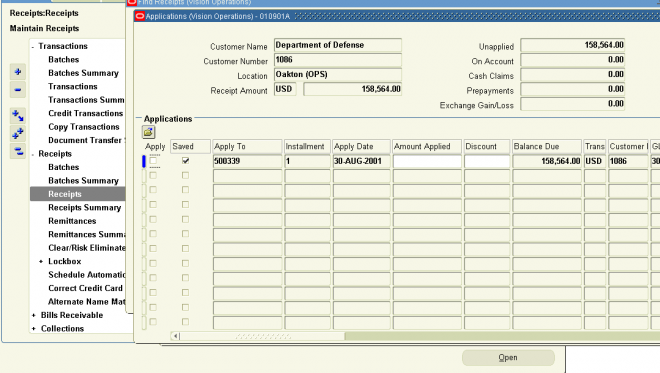
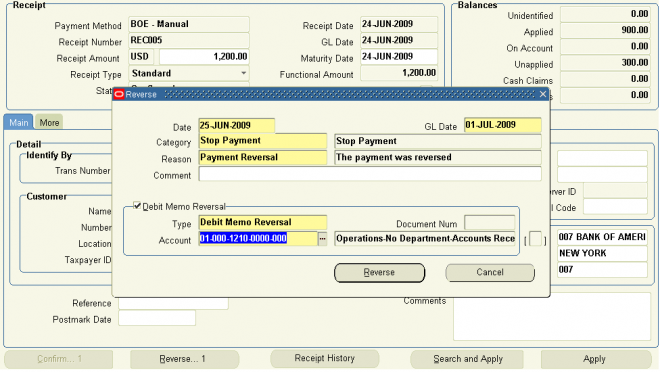
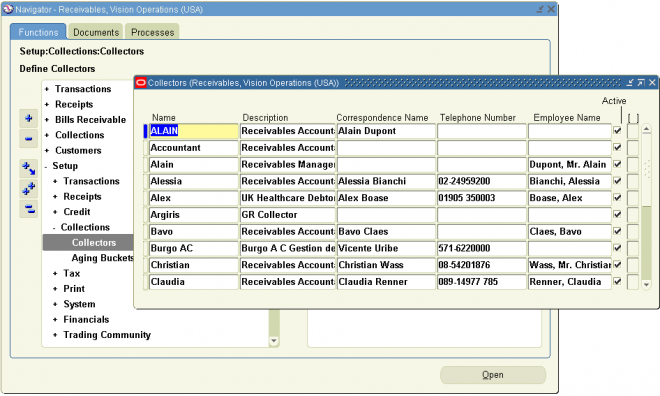
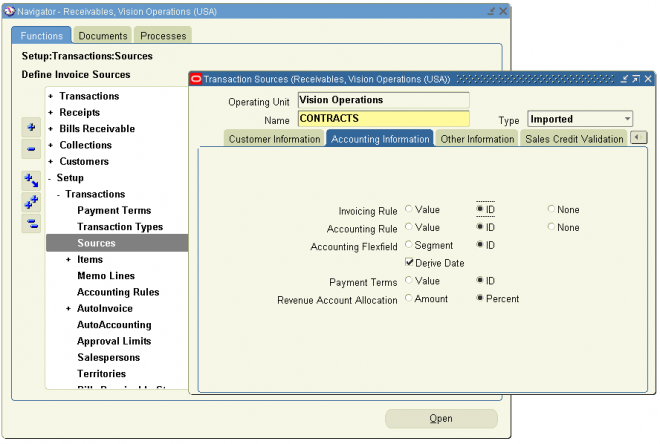
3. You can associate transaction types with your invoice sources in the Transaction Sources window to speed data entry in the Transactions and Credit Transactions windows. Active transaction types appear as list of values choices in the Transactions, Reverse Receipts, Credit Transactions, and Transaction Sources windows, and for bills receivable in the Bills Receivable and Receipt Classes windows.
4. You should define your transaction types in the following order:
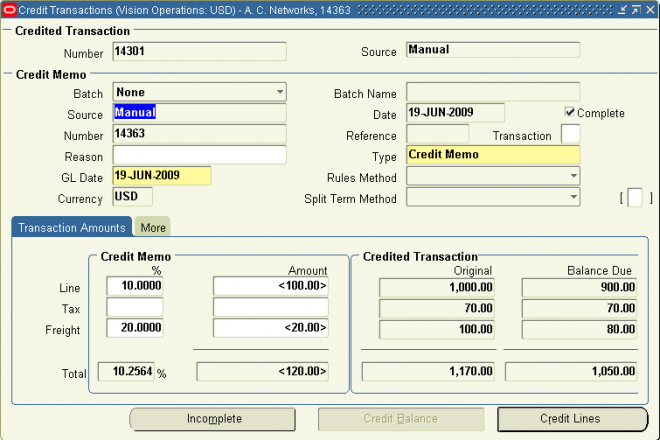
- credit memo transaction types
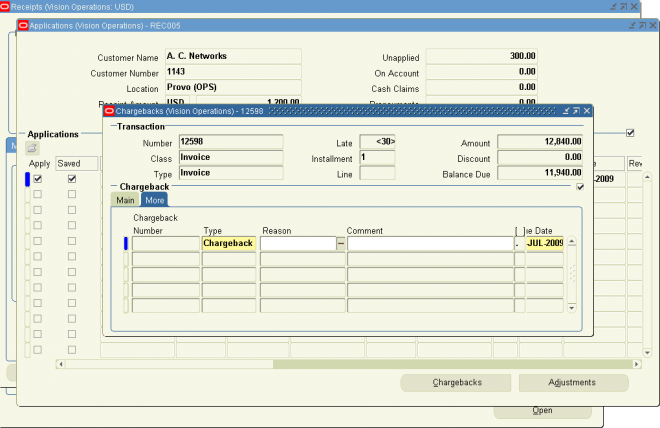
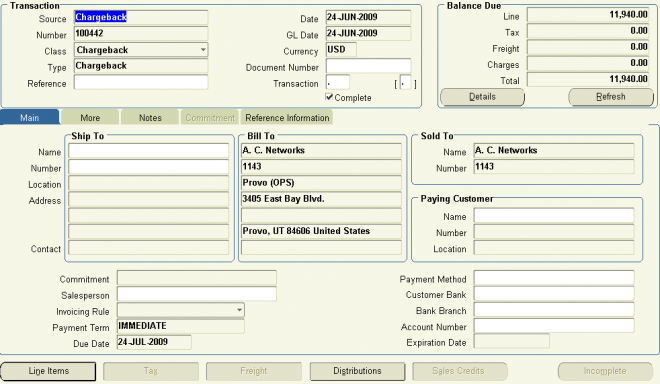
- invoice, debit memo, and chargeback transaction types
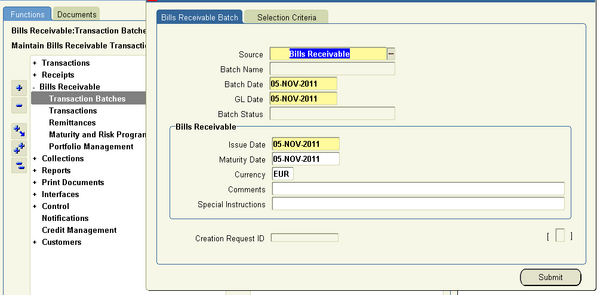
- bills receivable transaction types
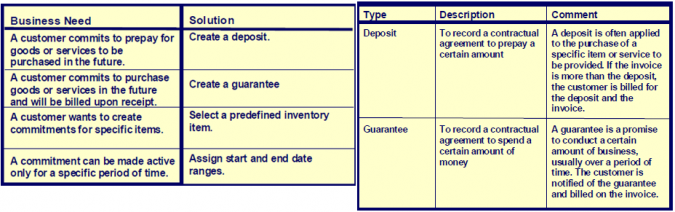
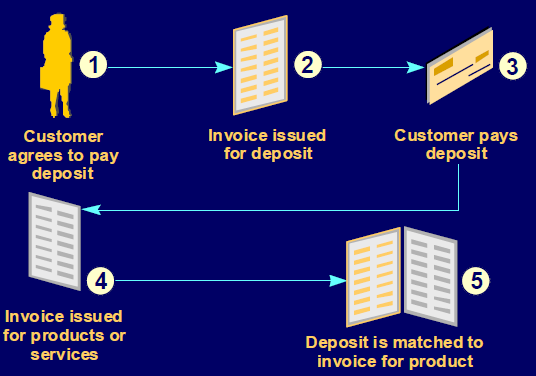
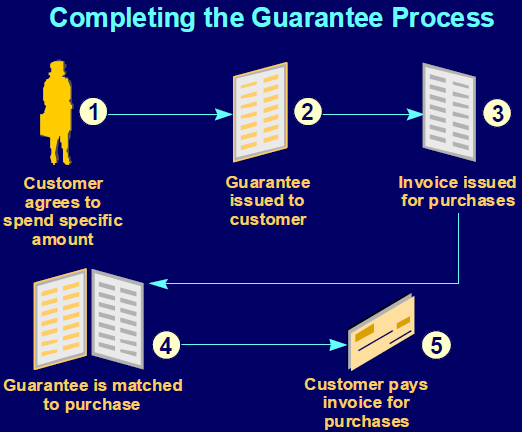
- commitment transaction types - Guarantee, Deposit
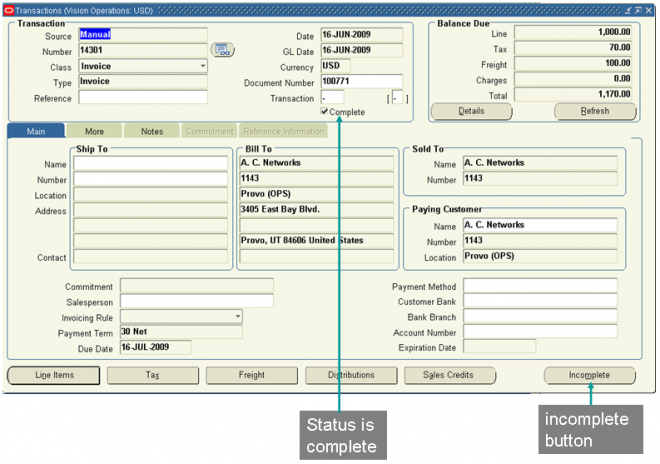
5. To be able to void a debit memo, credit memo, on–account credit or invoice, define a Void transaction type with ’Open Receivables’ and ’Post to GL’ set to No. Then, as long as there is no activity against the transaction and it has not been posted to your general ledger, you can make it invalid by simply changing the transaction type to ’Void’.
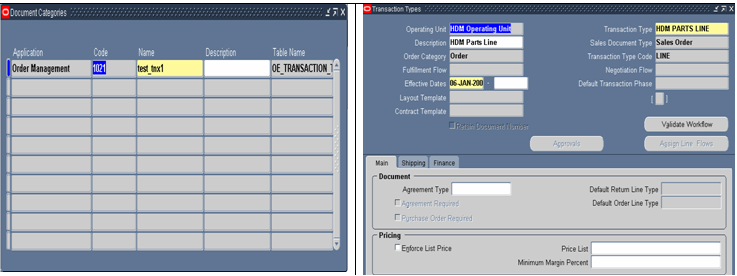
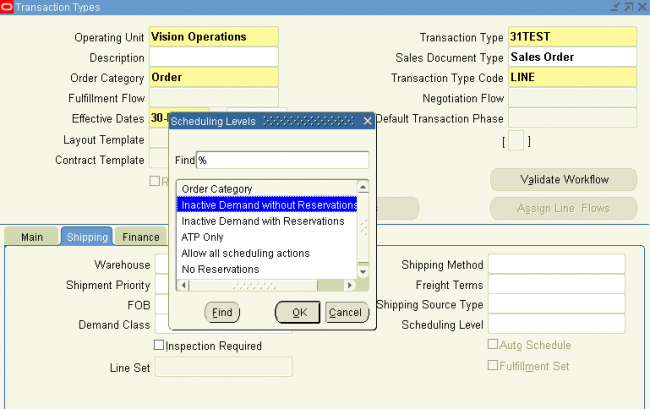
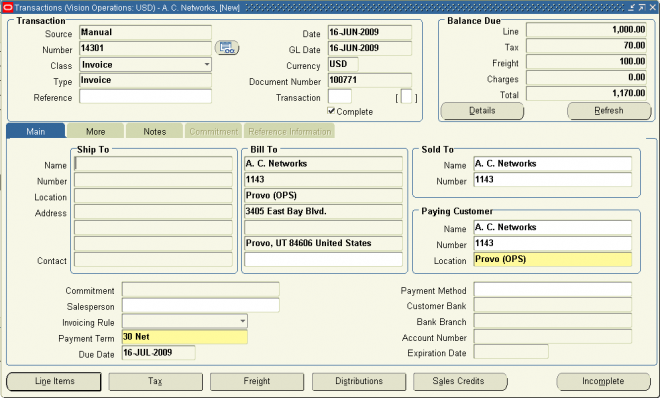
Define a transaction type
Navigate to the Transaction Types window.
1. Enter a Name and Description for this transaction type.
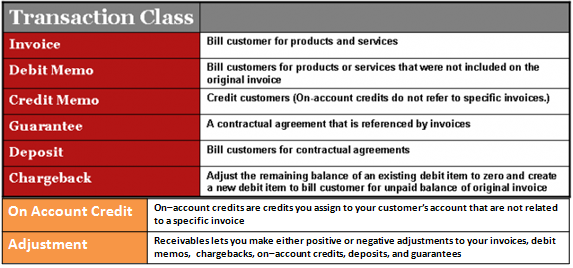
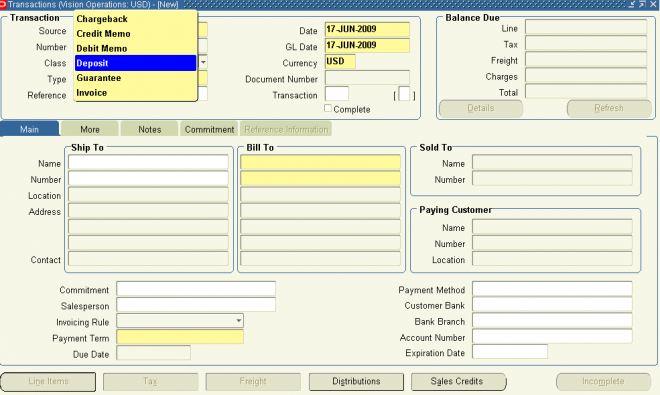
2. Enter a Class for this transaction type. Choose from the following classes: Invoice, Chargeback, Credit Memo, Debit Memo, Deposit, or Guarantee. If you choose Deposit or Guarantee, Receivables sets Open Receivable and Post to GL to Yes, Allow Freight, Tax Calculation, and Allow Overapplication to No, Creation Sign to ’Positive Sign,’ and Natural Application Only to Yes
3. Enter the payment Terms to use for transactions with this transaction type.
4. If this transaction type’s class is not Deposit or Guarantee, indicate whether you want transactions with this type to update your customer balances by checking or unchecking the Open Receivable box. If Open Receivable is set to Yes, Receivables updates your customer balances each time you create a complete debit memo, credit memo, chargeback, or on–account credit with this transaction type. Receivables also includes these transactions in the standard aging and collection processes. If you are defining a ’void’ transaction type, set Open Receivable to No.
Suggestion: You can use the Open Receivable option to implement an approval cycle for any temporary or preliminary debit memos, credit memos, on–account credits, chargebacks, and invoices that you may use in your business. For particularly sensitive debit memos, credit memos, on–account credits, chargebacks, and invoices that you may want to review, you can define a transaction type called Preliminary with Open Receivable set to No. This transaction type does not update your customer balances. When you review and approve the item, you can then change the transaction type to Final (a transaction type that you define with Open Receivable set to Yes) which will update your customer’s balances.
5. To be able to post transactions with this type to your general ledger, check the Post To GL box. The default is the value you specified for the Open Receivables option. This box must be checked if the class is Deposit or Guarantee.
If you are defining a ’void’ transaction type, do not check this box.
6. Choose a Transaction Status of Open, Closed, Pending, or Void. Use these statuses to implement your own invoice approval system. Enter ’Void’ to void debit memos, on–account credits or invoices to which you assign this transaction type.
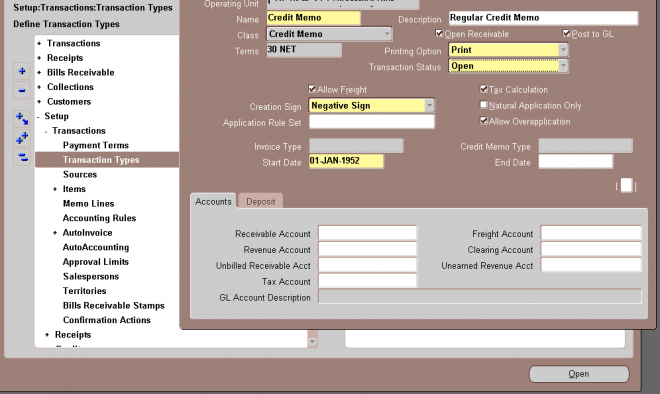
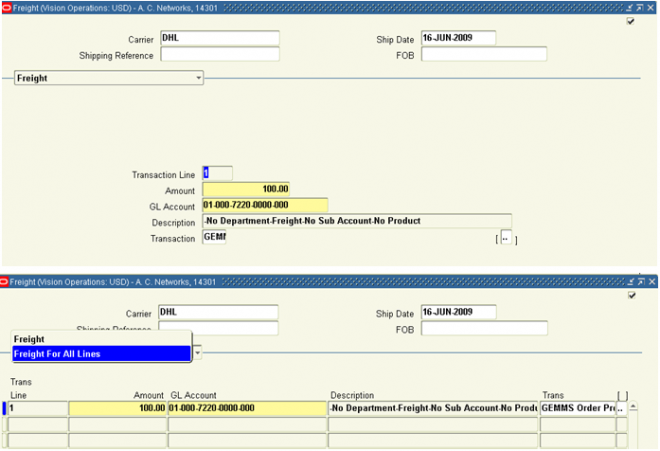
1. To allow freight to be entered for transactions with this transaction type, check the Allow Freight box.
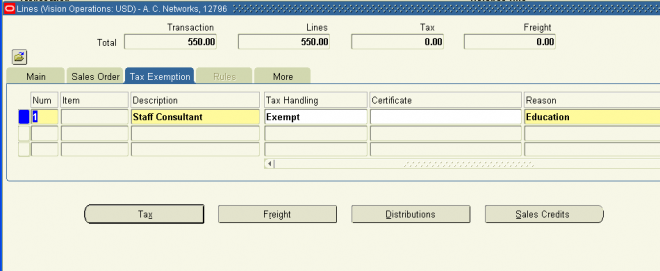
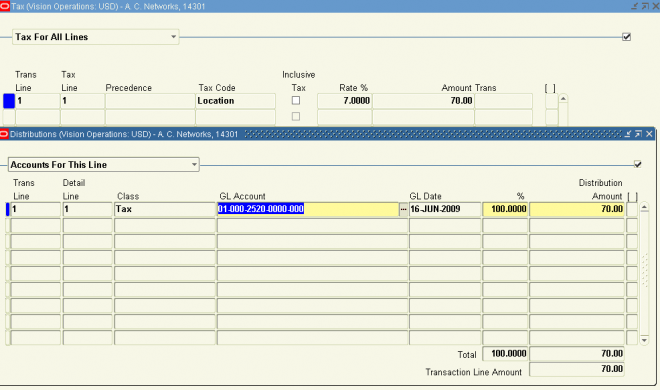
2. To let Receivables calculate tax for transactions with this transaction type, check the Tax Calculation box. If you do not check this box, the Tax Code field in the Lines window will not be required and Receivables will not perform tax calculations or create tax accounting entries for transactions with this transaction type (this is also true for transactions in Oracle Order Management and Oracle Sales and Marketing).
3. Choose a Creation Sign. The default is Positive Sign for transaction types with a class of either Guarantee or Deposit. If you are using the Cash Basis accounting method, your transaction’s creation sign must be either Positive Sign, Negative Sign, or Any Sign. You cannot update this field after you enter transactions with this type.
4. If this transaction type’s class is not Deposit or Guarantee and you want to restrict the direction in which items with this transaction type can be updated by applications entered against them, check the Natural Application Only box. If you check this box, Receivables sets Allow Overapplication to No. You cannot update this option after you save this transaction type.
5. If this transaction type’s class is not Deposit or Guarantee, and you did not check the Natural Application Only box, choose whether to Allow Overapplication against items with this transaction type by checking or unchecking this box. If you check this box, Receivables sets Natural Application to No and you cannot update it after you save this transaction ype. If you use the Cash Basis accounting method, the default value is No and you cannot change it.
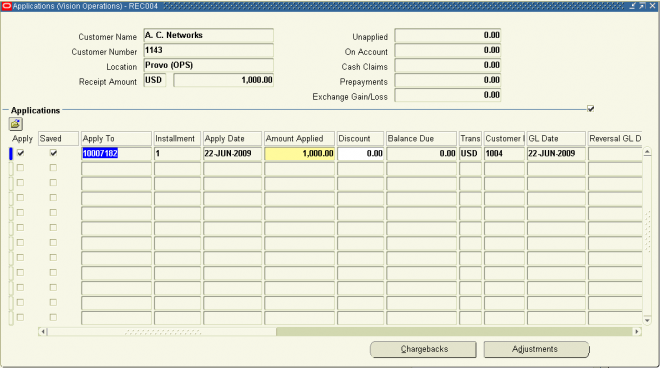
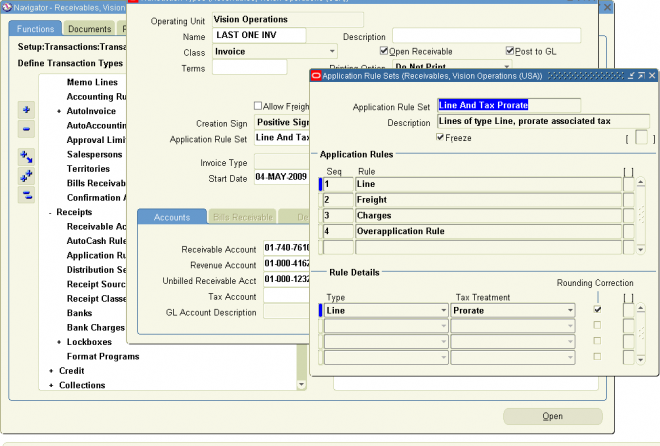
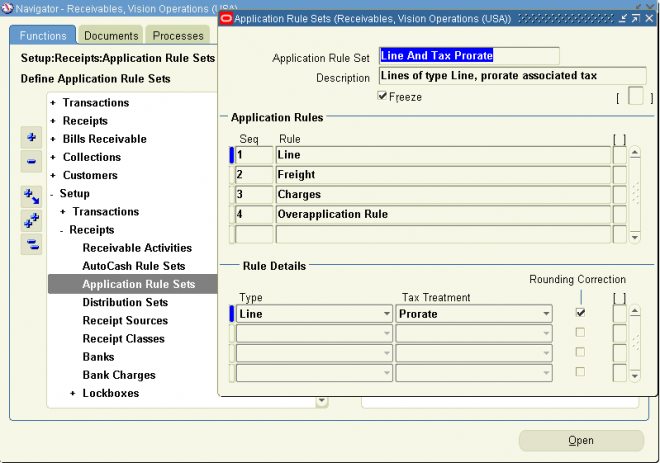
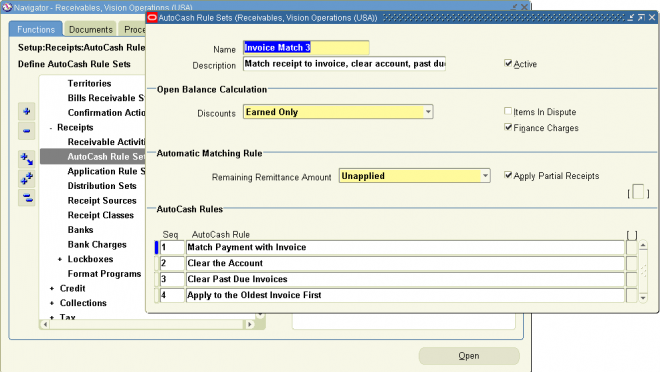
6. Enter an Application Rule Set for this transaction type or select one from the list of values (optional). An Application Rule Set determines the default payment steps when you use the Applications window or AutoLockbox to apply receipts to transactions using this type. If you do not enter a rule set, Receivables uses the rule set in the System Options window as the default.
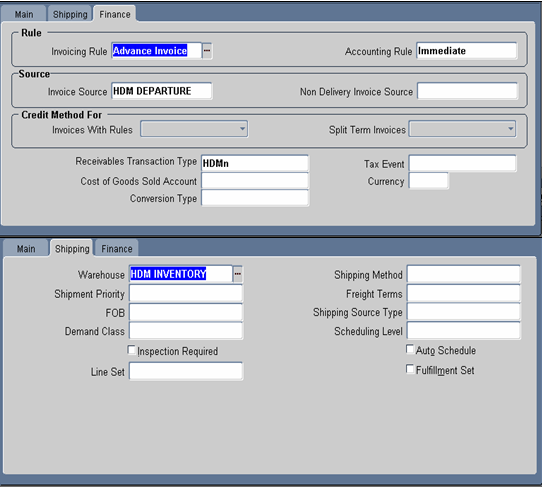
Account
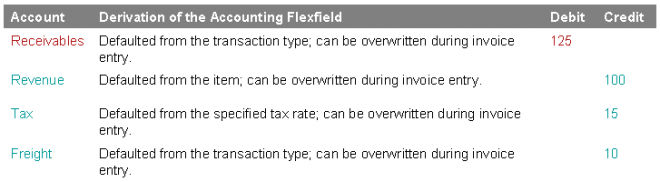
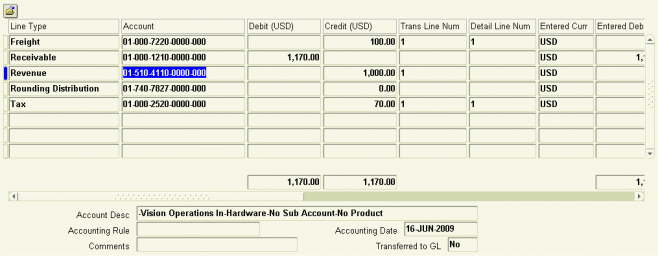
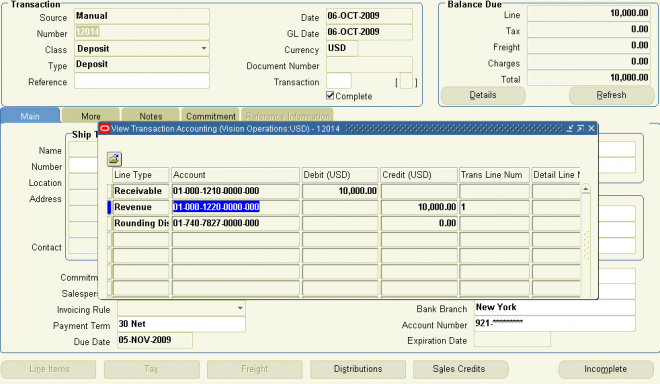
1. Enter the Receivable Account for transactions with this transaction type. Receivables uses this information, along with your AutoAccounting definition, to determine the receivable accounts for transactions with these types. Receivables creates a receivables transaction record using this account so you can transfer to your general ledger and create a journal entry if Post To GL is Yes for this transaction type.
2. Enter a Revenue Account for transactions with this transaction type. Receivables skips this field if Allow Freight is set to No. Receivables uses this information, along with your AutoAccounting definition, to determine the revenue account for transactions with this transaction type.
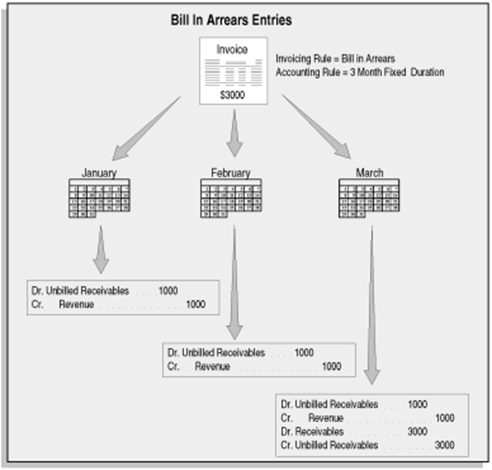
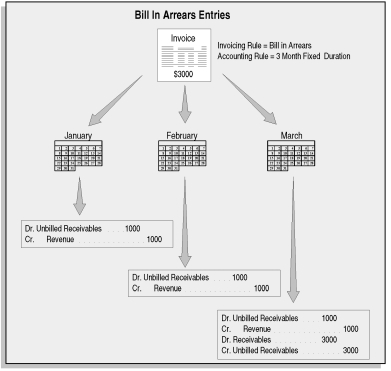
3. If this transaction type’s class is Invoice or Credit Memo, enter an Unbilled Receivable Account. When you use the Bill In Arrears invoicing rule, Receivables uses this information, along with your AutoAccounting definition, to determine the Unbilled Receivable account for transactions with this transaction type.
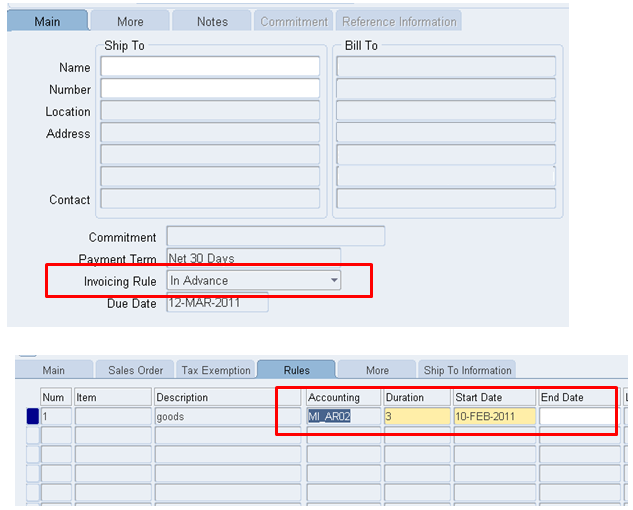
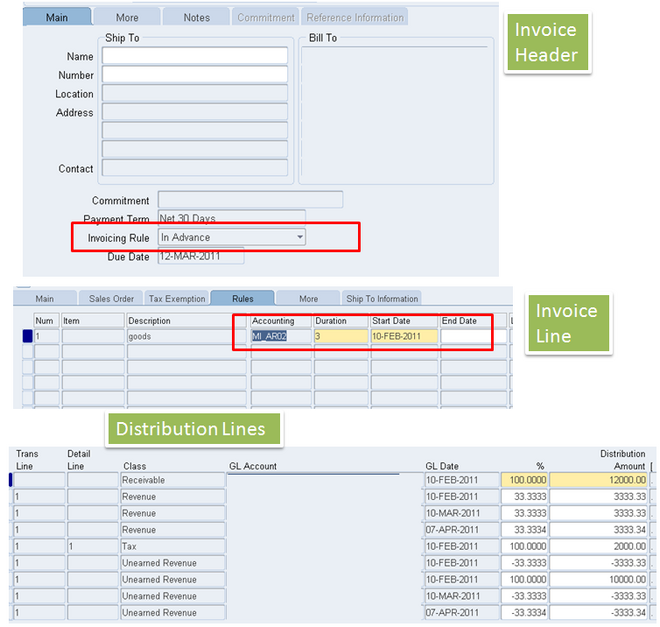
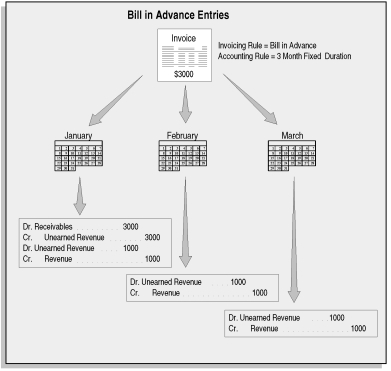
4. If this transaction type’s class is Invoice or Credit Memo, enter an Unearned Revenue Account. Receivables uses this information, along with your AutoAccounting definition, to determine the unearned revenue account for transactions with this transaction type. Receivables only uses this account when your transaction’s invoicing rule is Bill In Advance.
5. Enter a Freight Account for transactions with this transaction type. Receivables uses this information, along with your AutoAccounting definition, to determine the freight account for transactions with this transaction type. Receivables skips this field if this transaction type’s class is Deposit or Guarantee or if Allow Freight is set to No.
6. If this transaction type’s class is Invoice, Credit Memo, or Debit Memo, enter a Tax Account. Receivables uses this information along with your AutoAccounting definition to determine the tax account for transactions with this transaction type.
7. If this transaction type’s class is Invoice or Debit Memo, enter a Clearing Account for transactions with this transaction type.Receivables uses this account to hold any difference between the revenue amount specified for the Revenue account and the selling price times the quantity for imported invoice lines. Receivables only uses the clearing account if you have enabled this feature for transaction sources that you use for your imported transactions.


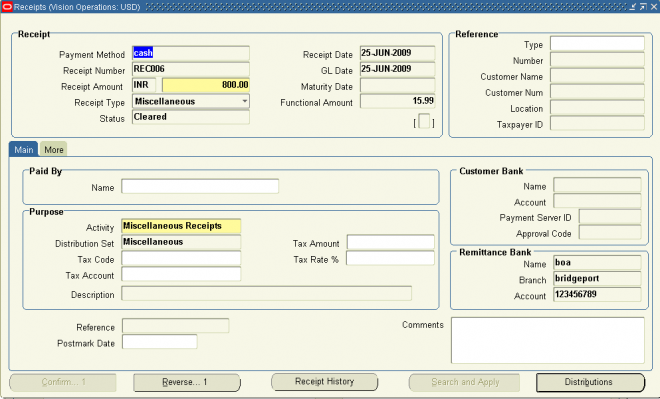

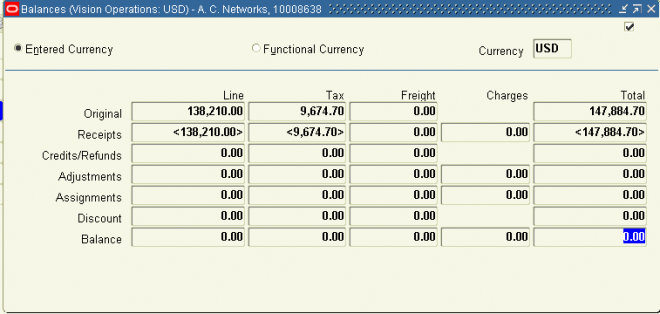


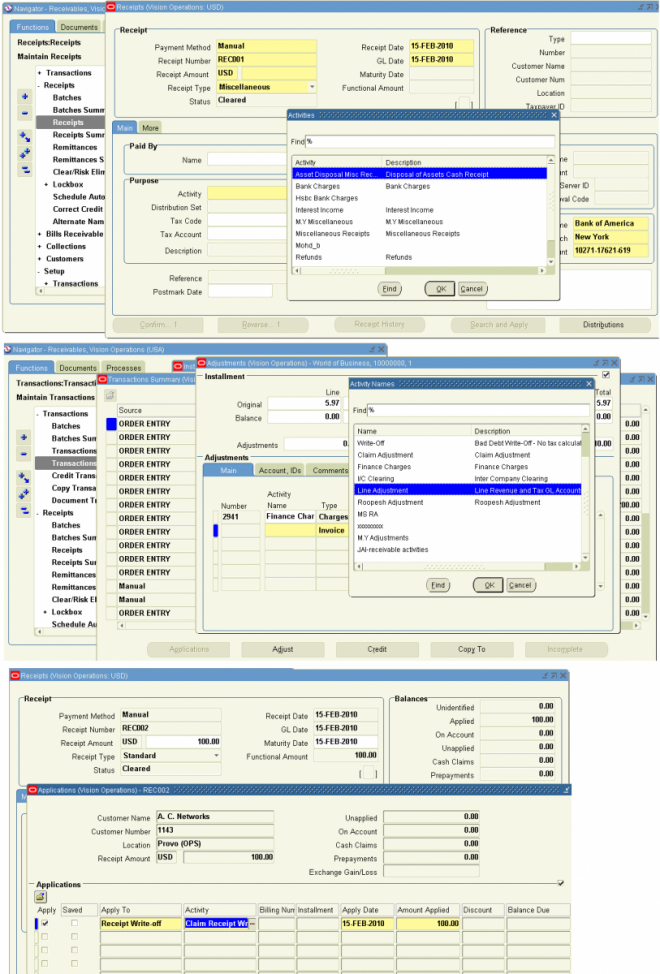


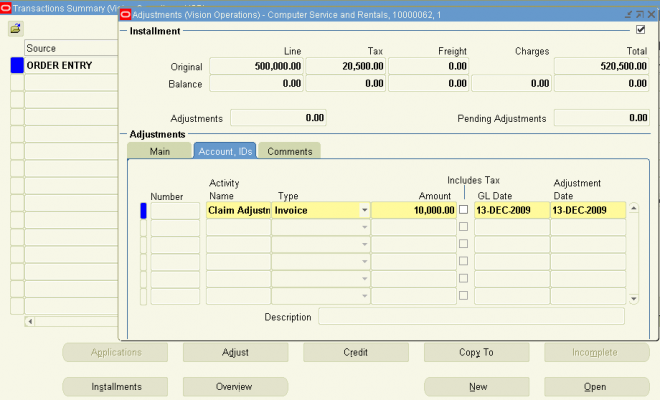


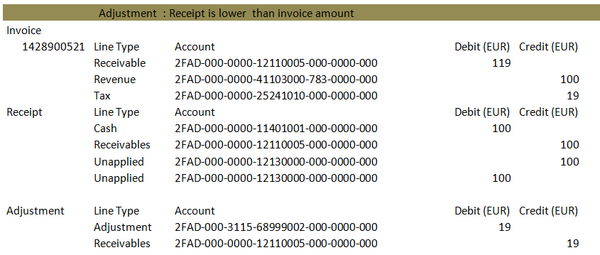
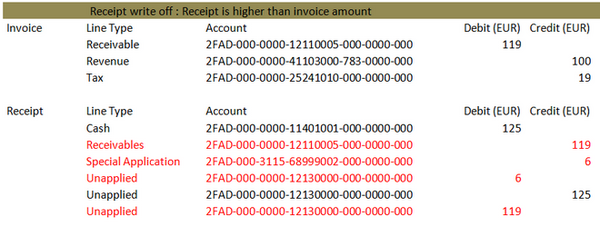 Scenario Scenario 2: For an Invoice amount of 119, customer pays 119 but the bank charges 19 as transaction fee. In this case the business can take 100 cash and 19 to the adjustment. The revenue‘ll remain the same 119.