Oracle Assets
* Asset Maintenance - Adjustment, Transfer, Reclass & Revaluation
Oracle Assets simplifies asset management and accounting complexities. It lowers the cost of asset ownership and secures your assets while giving you a global view. Oracle Assets is a member of Oracle’s Asset Lifecycle Management solution, which maximizes the return on your global assets.
Integration within the Oracle E-Business Suite optimizes your asset management processes:
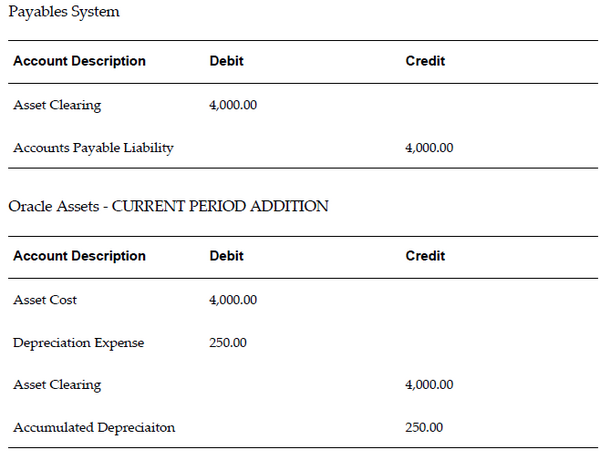
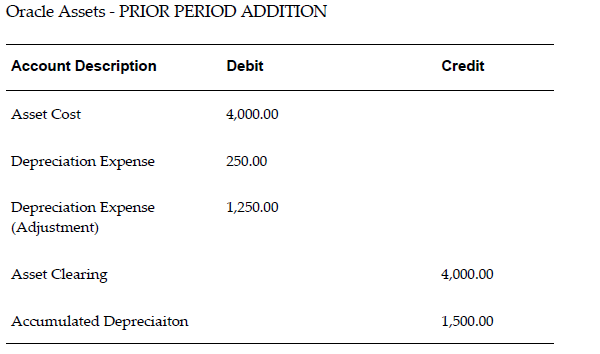
- Oracle Payables – Automate asset additions as part of the procure-to-pay process to interface depreciable capitalized assets. Push lease payment amounts to Oracle Payables to ensure timely payments of your leased assets.
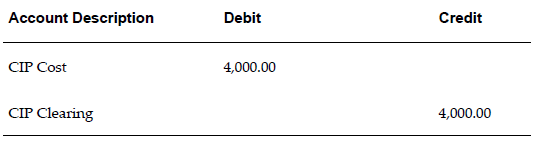
- Oracle Projects – Track construction-in-process project costs and capitalize them via integration with Oracle Projects. When retiring costly equipment and properties, track retirement project costs in Oracle Projects and transfer them into Oracle Assets for capital gains and loss calculations.
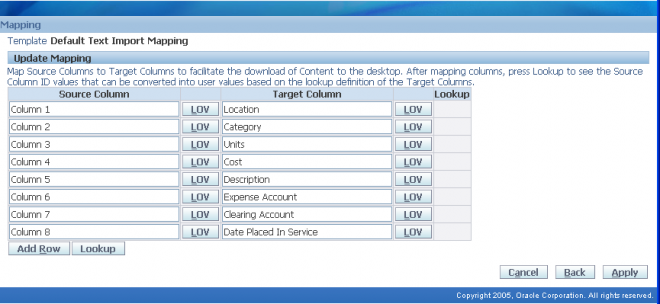
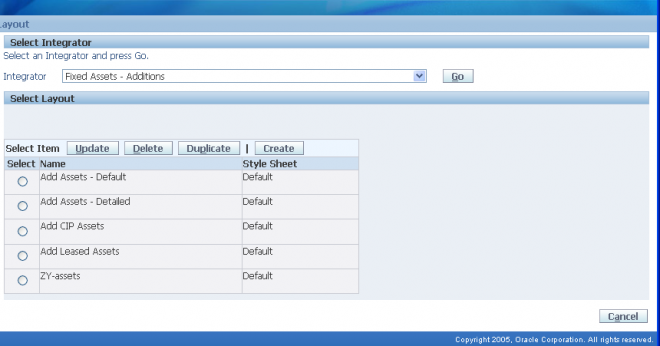
- Oracle Application Desktop Integrator – Create assets and import physical inventory from spreadsheets.
You can perform most of your transactions in Oracle Assets using just three windows: the Assets Workbench, Mass Additions Workbench, and Tax Workbench.
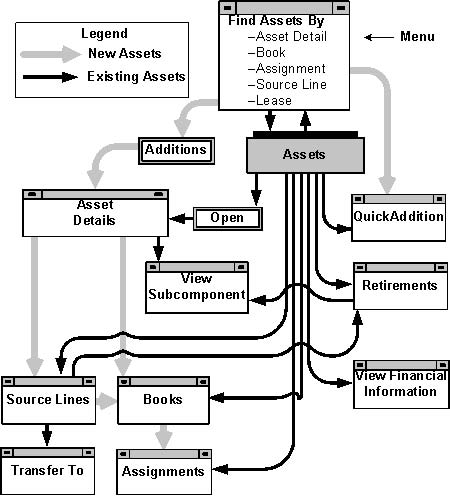
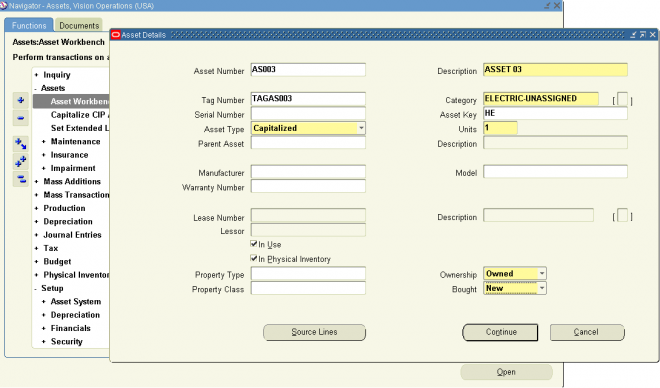
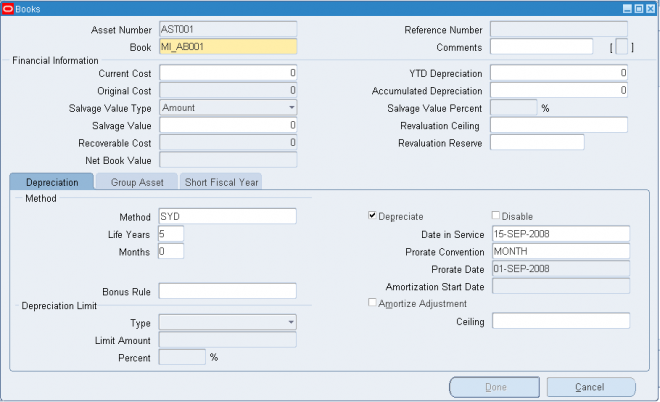
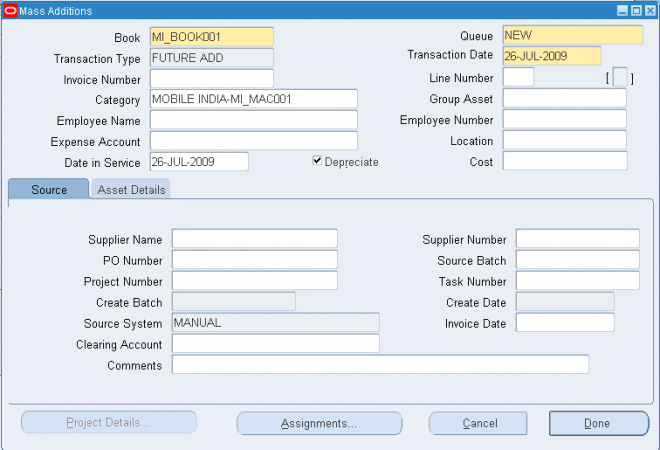
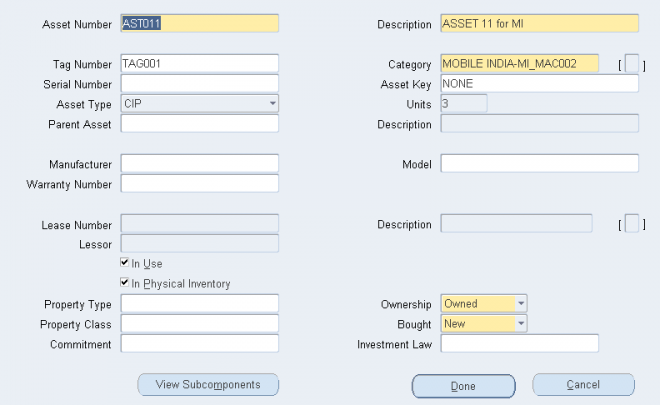
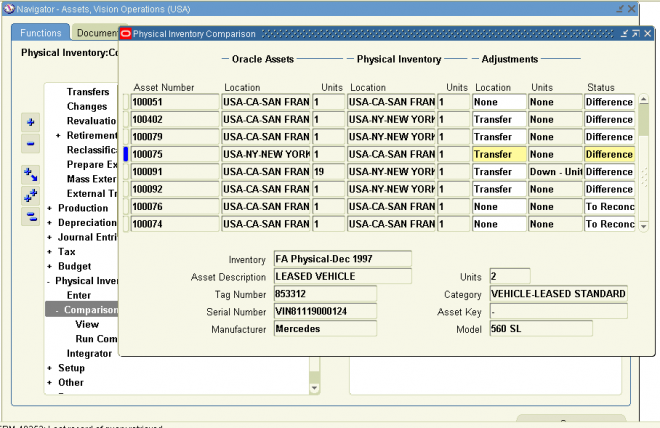
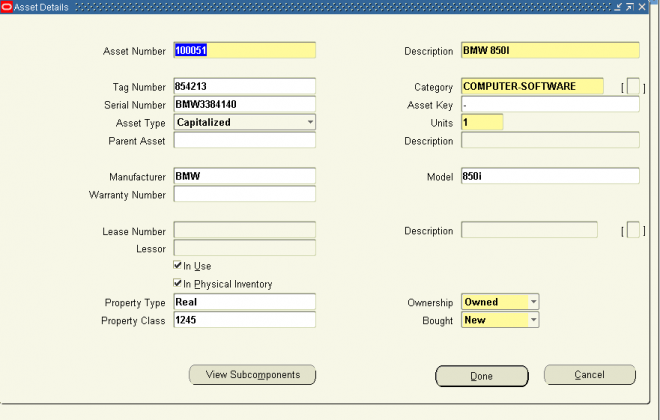
Assets Workbench
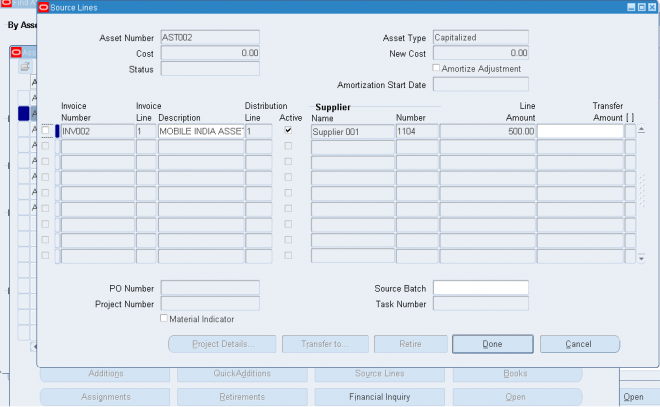
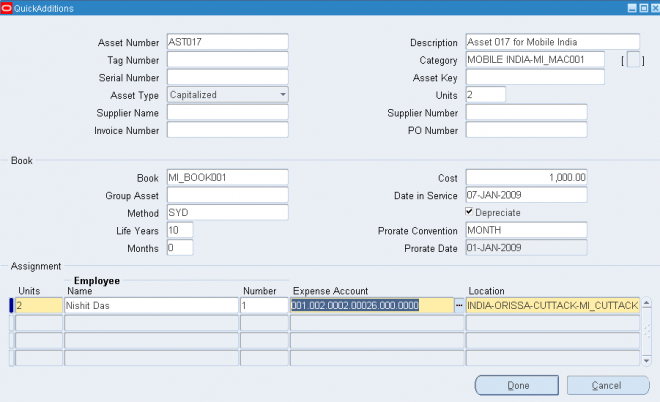
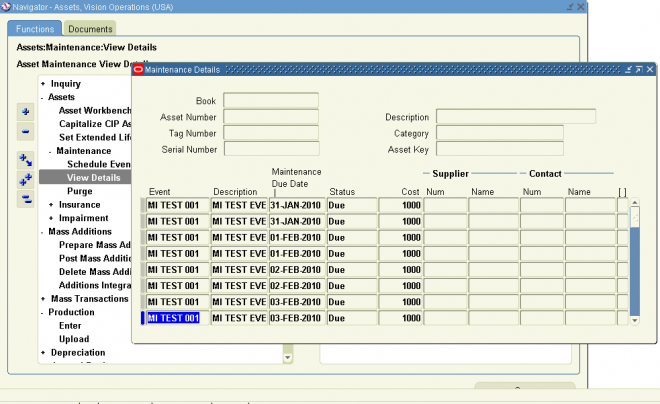
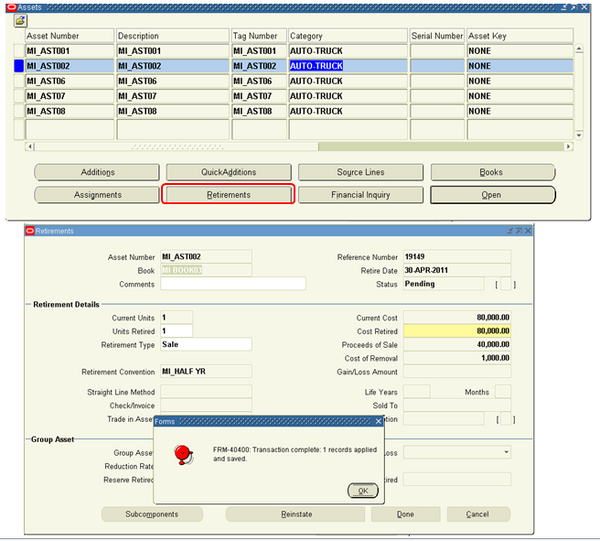
Use the Assets Workbench windows to add new assets to the system, and to perform transactions, such as retirements, adjustments, source line adjustments, and transfers. You can also review asset detail, financial, and assignment information using this workbench. The Assets Workbench graphic is a graphical representation of the windows in the Assets Workbench and their relationship to each other
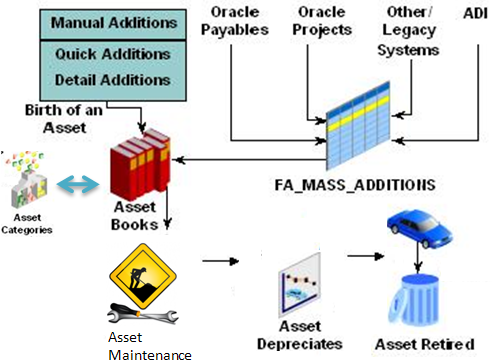
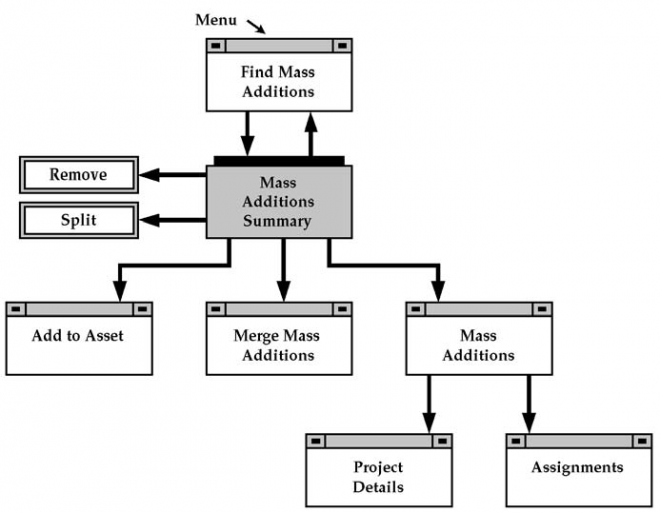
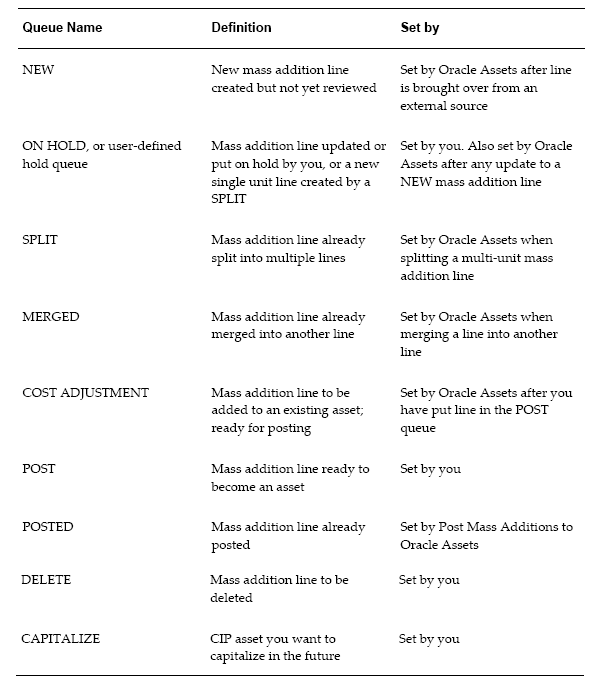
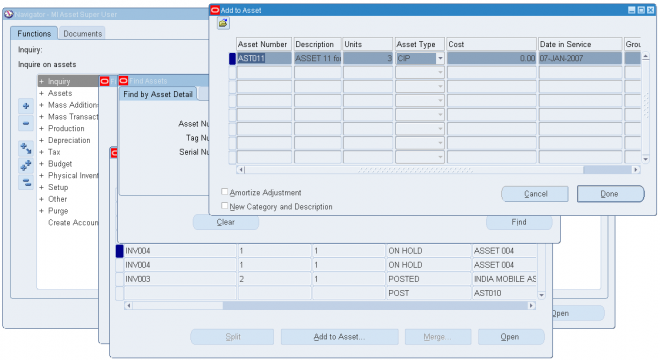
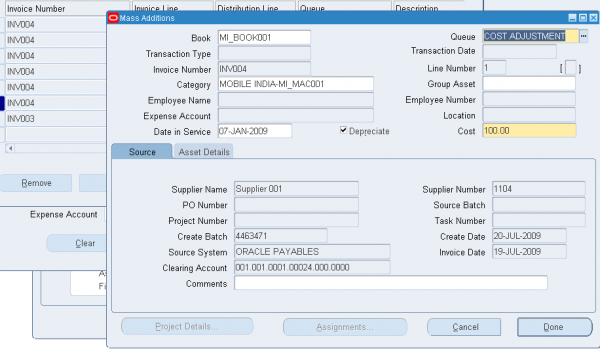
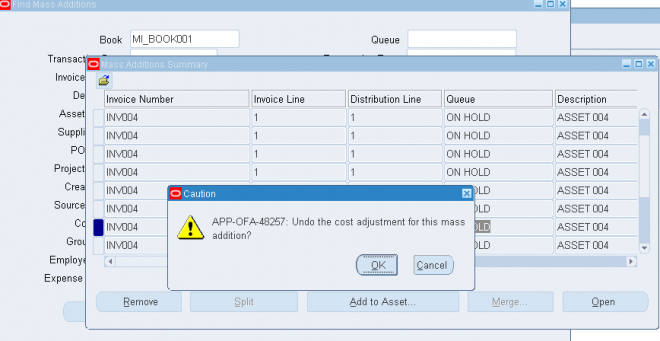
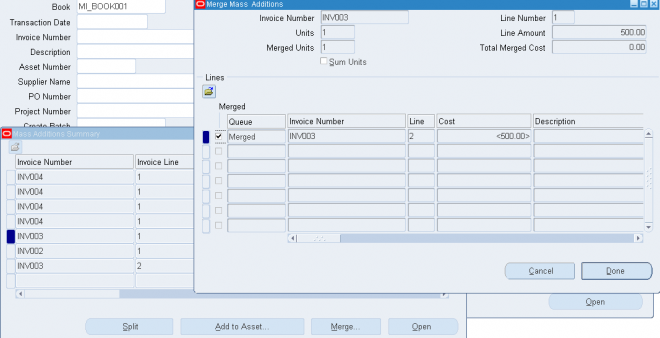
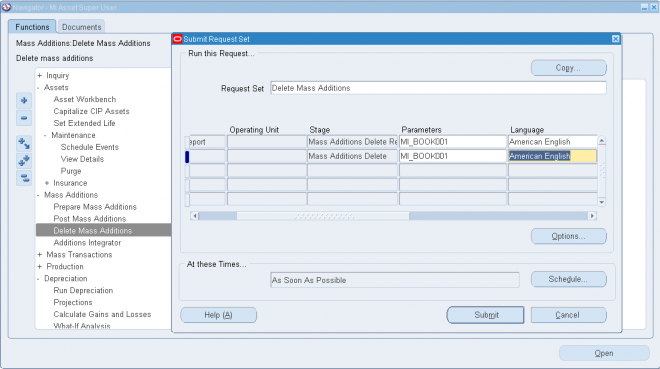
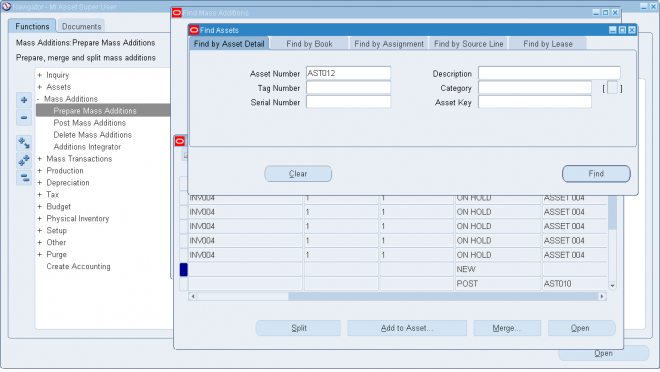
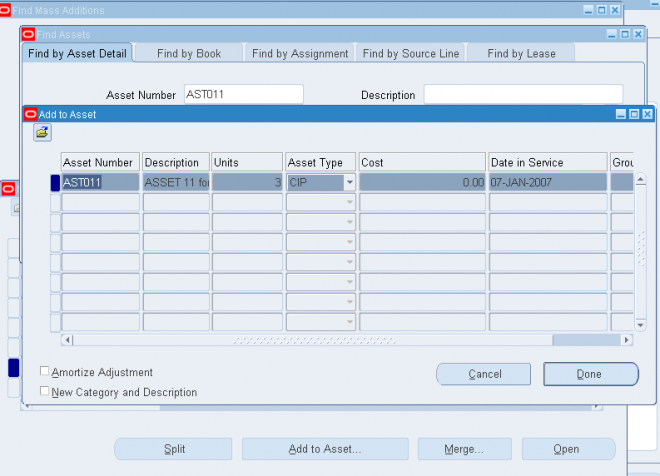
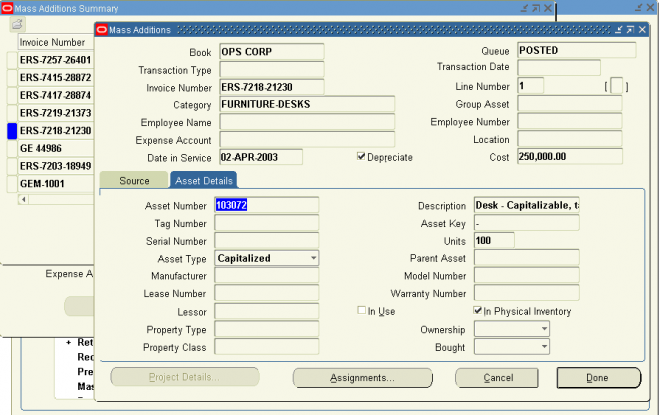
Mass Additions Workbench
Use the Mass Additions workbench windows to review, merge, split, and remove mass additions. The Mass Additions Workbench graphic is a graphical representation of the windows in the Mass Additions Workbench and their relationship to
each other.
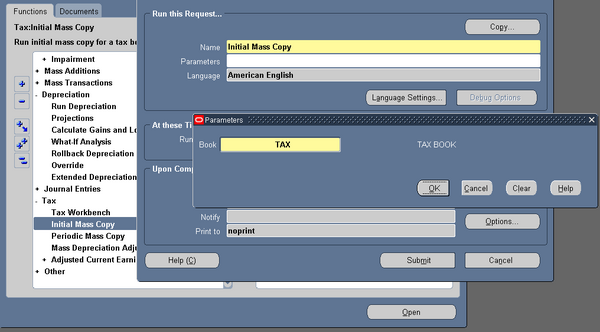
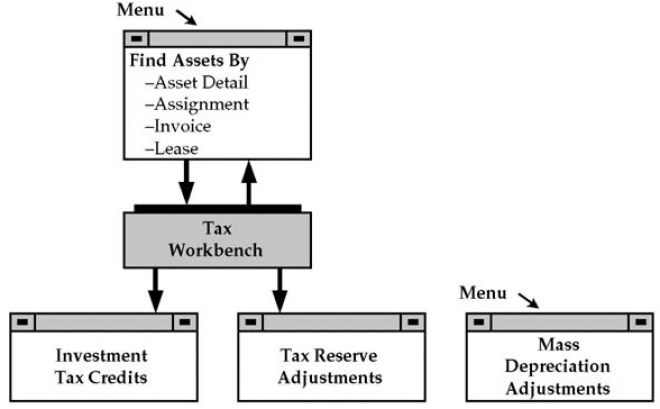
Tax Workbench
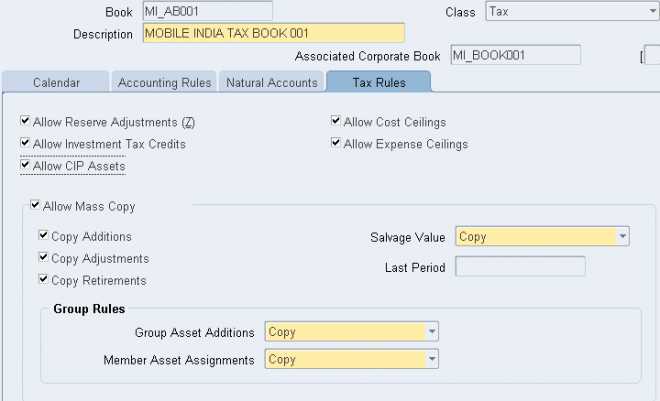
Use the Tax Workbench to assign investment tax credits and to perform reserve adjustments.
The Tax Workbench graphic is a graphical representation of the windows in the Tax Workbench and their relationship to each other.
Use the Tax Workbench to assign investment tax credits and to perform reserve adjustments.
The Tax Workbench graphic is a graphical representation of the windows in the Tax Workbench and their relationship to each other.


 6.
6. 


 Deleted