Label Printing Strategies
Oracle WMS and MSCA have robust label printing capabilities built into the product to easily produce compliance labels at any point in the business process and with any data. Oracle works with two types of label printing partners – direct to- printer, and print server – to provide the full end-to-end solution, and each of these partners have different strengths.
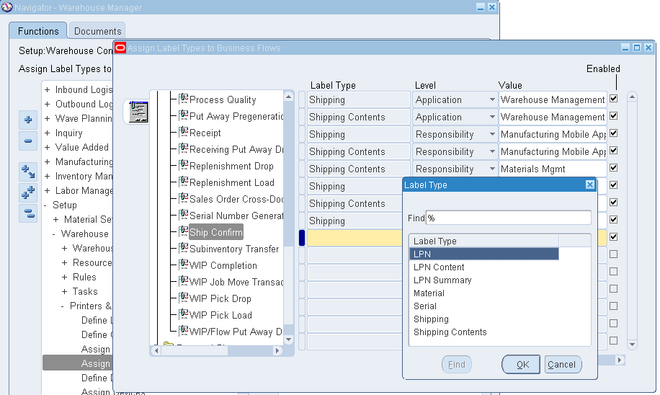
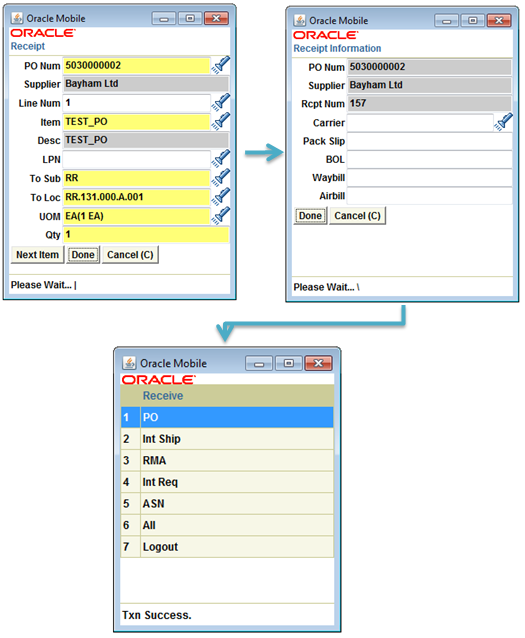
Oracle WMS produces label XML files as part of a transaction or event, such as a purchase order receipt, pick confirmation, work order completion, or license plate generation.
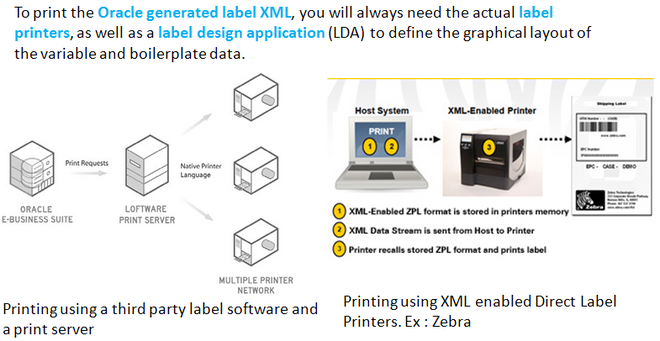
To print the Oracle generated label XML, you will always need the actual label printers, as well as a label design application (LDA) to define the graphical layout of the variable and boilerplate data. These strategies differ, however, on the basis of the integration of the XML to that format occurs within the printer firmware with no other middleware, or in a separate print server application.
Direct-to-print label printers that natively understand Oracle’s XML allow you to directly print the Oracle generated label XML without any middleware or print server.
The print servers, on other hand, add an intermediary layer between Oracle Applications and actual label printer. Although the print servers introduce an additional partner and added implementation cost, they also provides significant value in the areas of print management, label configuration and manipulation, error management and Internet printing.
Oracle supports two types of label printing configurations:
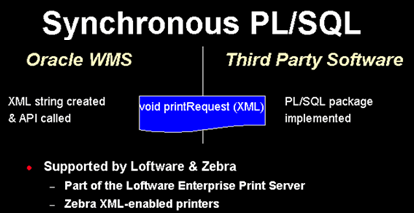
1. Printing using a third party label software and a print server
2. Printing using XML enabled Direct Label Printers.
The printing strategy selection depends on several factors – ROI, real time latency, need for compliance labeling, printer models in current use, volume of labels to be printed, network infrastructure et al. To reiterate, each additional layer between Oracle WMS and the printer gives you additional flexibility, while also generally also meaning additional complexity and cost.
PRINT SERVER SOLUTIONS
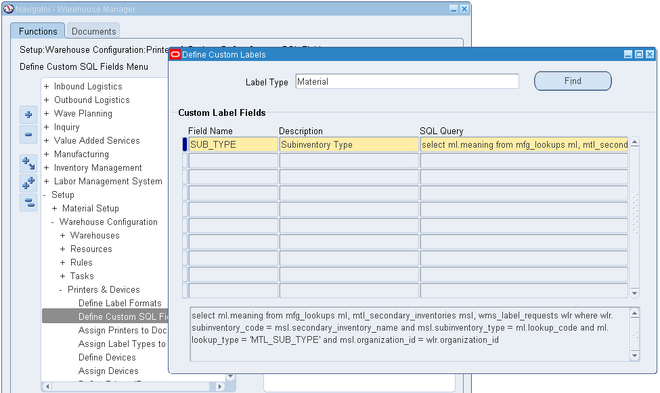
This strategy require s you to have a configuration of Oracle WMS, third party label printing software, print server and a network of printers. The LDA allows you to define the different label formats that need to be printed, as well as manage the library of formats for an enterprise printing solution. The print server manages the print queue, comes with necessary printer drivers and the printer parameters associated with them. Finally, the label printer actually prints the label. The label printer can be from any vendor supported by the print server. Typically, the LDA and print server come same the vendor.
This strategy is recommended when you have a high volume of labels to print from each printer, and also is often simpler to maintain when the label formats change frequently. The LDA or related application sometimes enables you to configure the label with the content being derived from many sources, where the Oracle XML forms just one such source. A print server partner is usually recommended when the Oracle XML needs to be manipulated beyond the capabilities of standard Oracle functionality prior to printing, such as to pull in additional data elements, split an individual label request into multiple labels, or control the destination printer beyond Oracle’s basic rules. Many of the third party label software will allow you to custom program a label in these – and other – ways. Third party label print software will use Oracle XML as the primary data sources for the label fields, executing additional logic or ODBC calls as required.
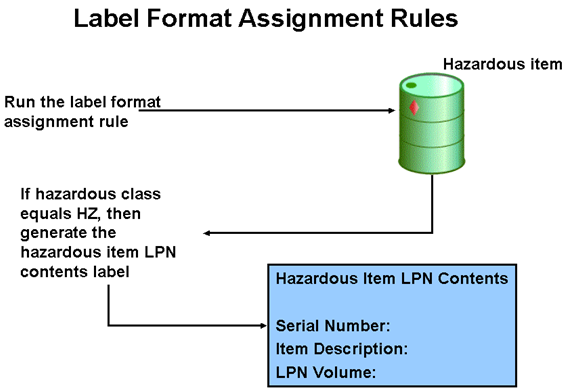
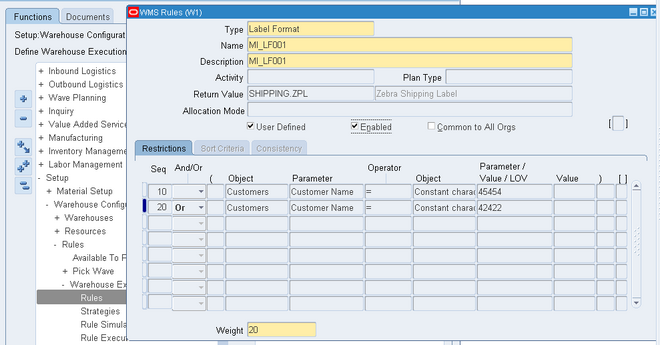
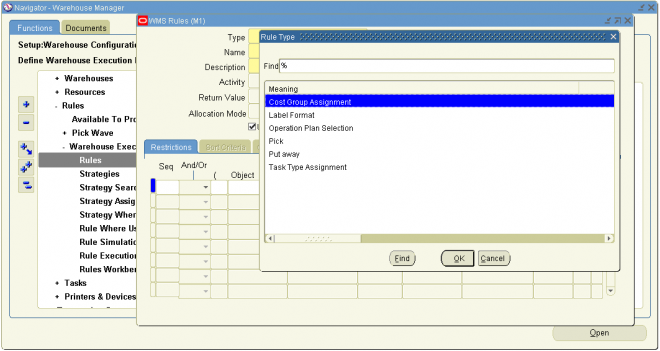
Another use of these extended capabilities from the print server partners is to compensate for the fact that Oracle MSCA lacks an inbuilt rules engine like Oracle WMS to determine the label to be printed. However, some label printing software help you to configure rules to determine the label to be printed and manipulation of the label.
This strategy is also recommended when you have printers from multiple manufacturers in a single site that all need to print a single format, as only some of the printers in your facility may be able to support XML directly, and furthermore, each of the Direct-to-Printer partners uses different LDAs that produce different pre-compiled output that may need to be loaded to the printers in different ways and using different tools. Additionally, the advanced queuing / print job management capabilities make this a preferred option when more than two or three users need to concurrently print large batches of labels from a single printer. While the print server partners may require an additional investment in software licenses and implementation costs, when you have characteristics such as those above that require the features of these partners, your total cost of ownership will actually be lower than trying to use the simpler architecture of the Direct-to-XML printers
Print server sloution works with all the three printing modes : Synchronous TCP/IP, Synchronous Generic & Asynchronous.
XML DIRECT PRINTER
In this strategy Oracle WMS sends the XML directly to the printer. The label printer is capable of receiving XML that meets Oracle’s label specification and merges with pre-defined label formats to print a label.
This strategy can be easily deployed when the Oracle XML does not need any manipulation to produce the label desired. The volume of printing and the number of users that would need to print concurrently to a single printer is also a factor. For instance, when more than three or four users may trigger simultaneous requests to print to a single printer, the number of available connections on some of the printers may be exceeded, or for large jobs, the buffers may overflow. While Oracle provides multiple mechanisms for reprinting so that the jobs are not lost, these volume and concurrency considerations should be included in evaluating the XML Direct printers against each other, and against a print server partner.
With some XML Direct partners, XML-enabled printers are only supported on their flagship printer models, so that you may pay a premium for this capability. On the other hand, all XML Direct printers to date are capable of running both modes, whereby they can parse both XML from Oracle and the print stream in their proprietary language, typically without any change in configuration, and typically, also simultaneously, so the same printer can be used in multiple ways, and you can easily change to a print server as your requirements grow.
The XML Direct strategy calls for pre-loading the printers with label formats. Since there is no centralized print server, every time you add a printer to the network, you need to load the required label formats, and every time you add a format, you need to add it to all the printers. Some partners have printer management software to aid in this decentralized approach.
XML direct printers work with both Synchronous TCP/IP and Synchronous Generic mode of printing. To enable to print in TCP/IP mode, you need to set ‘WMS Label Print Mode’ to ‘Synchronous – TCP/IP’ and define the TCP/IP IP
address and port number for each printer in the network.
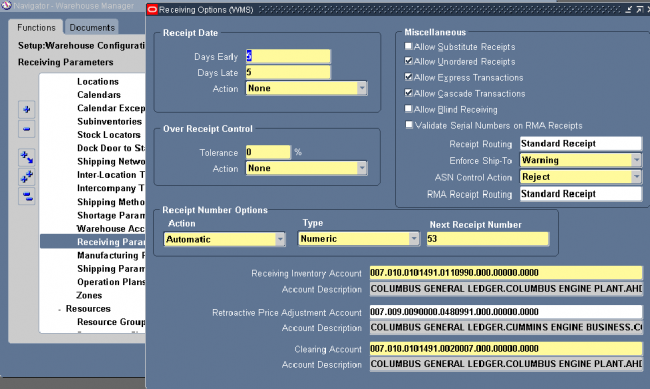
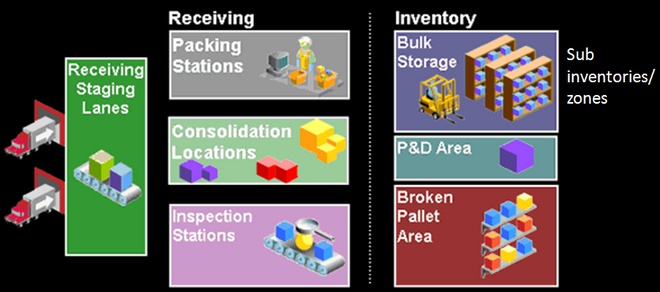 1. Receiving area layout
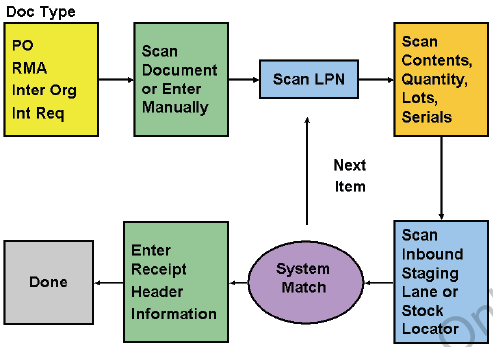
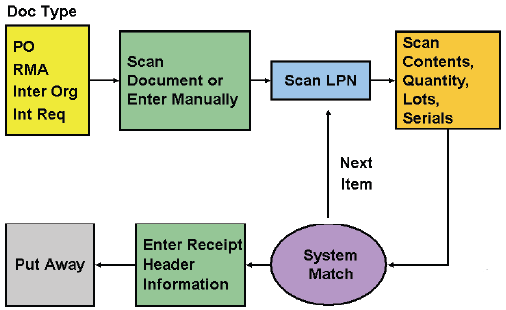
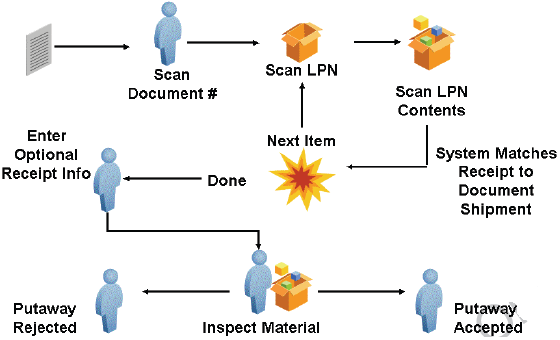
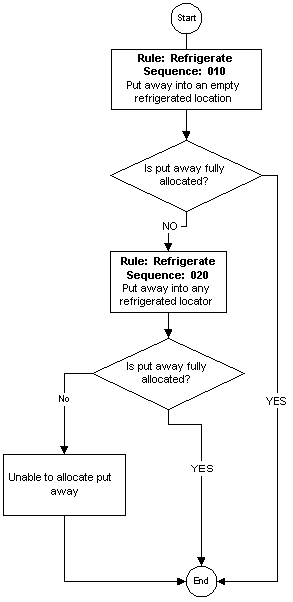

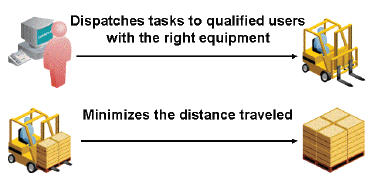
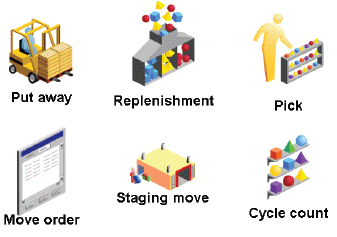

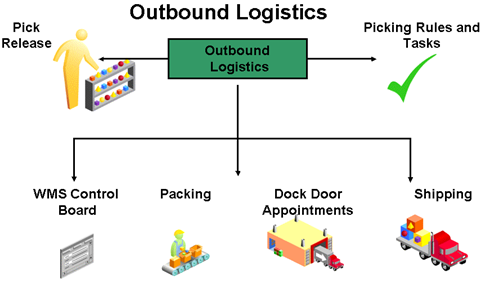
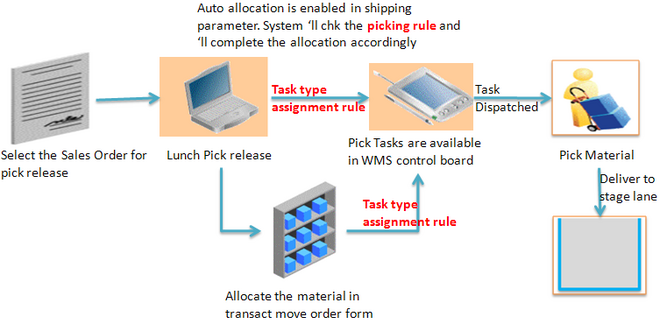
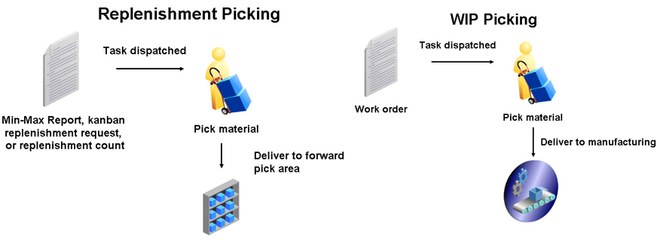
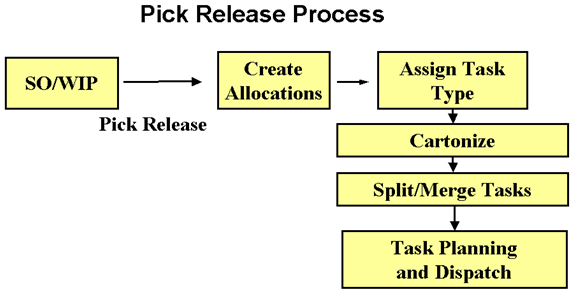
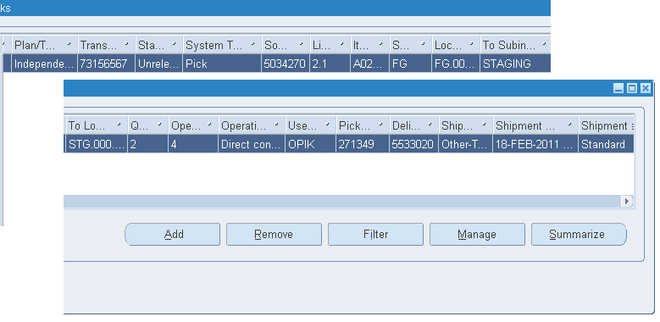
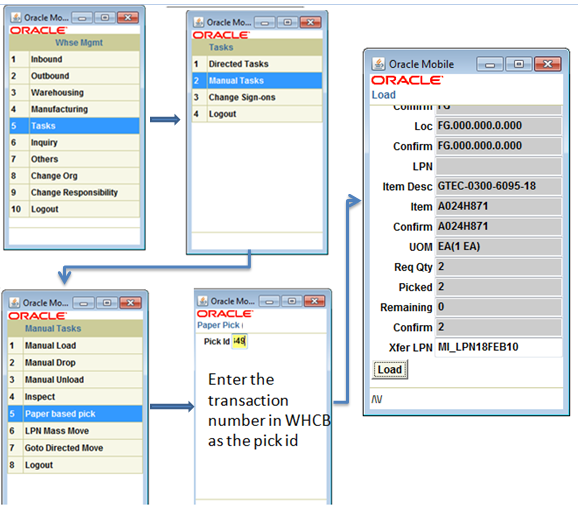
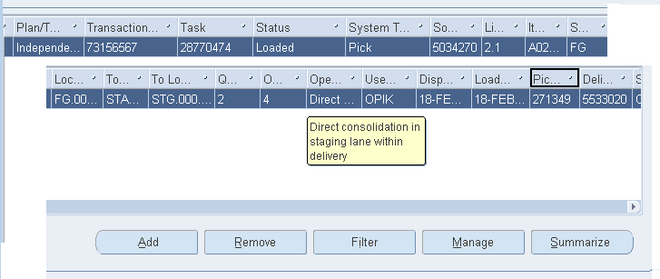
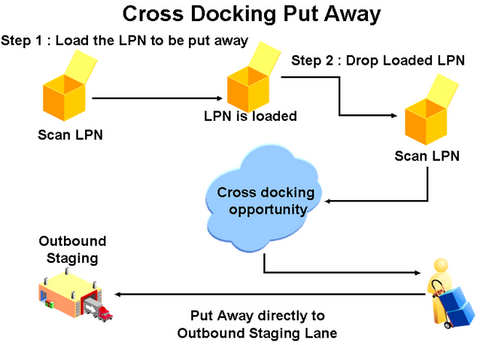
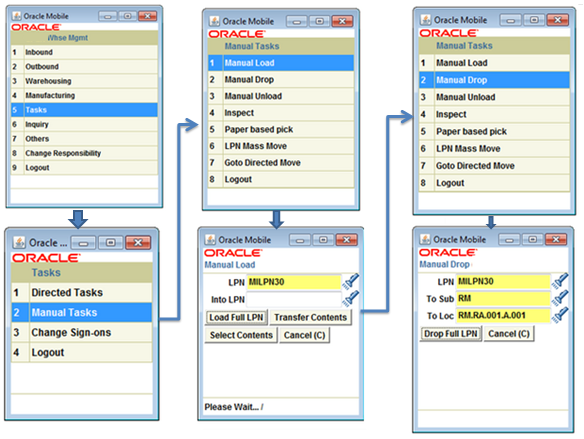
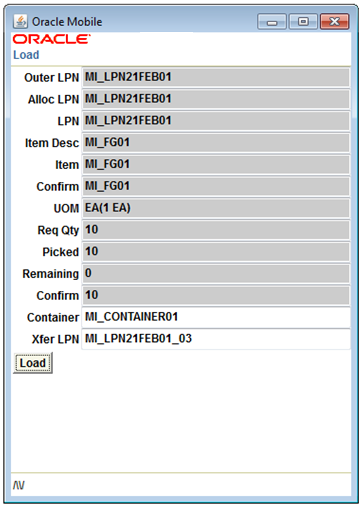
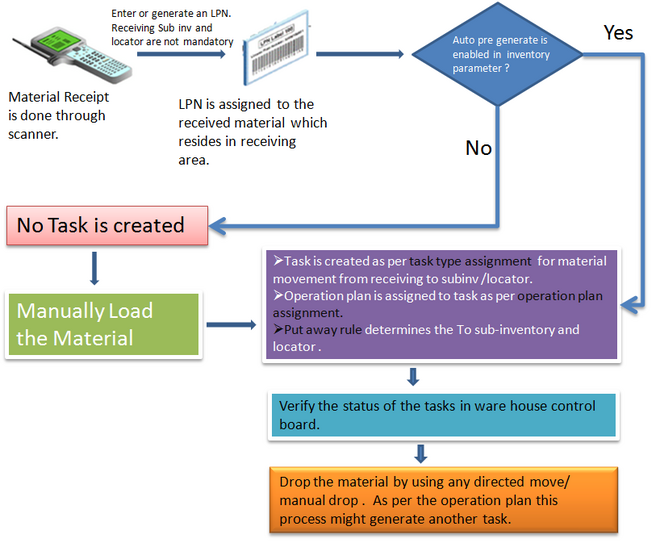
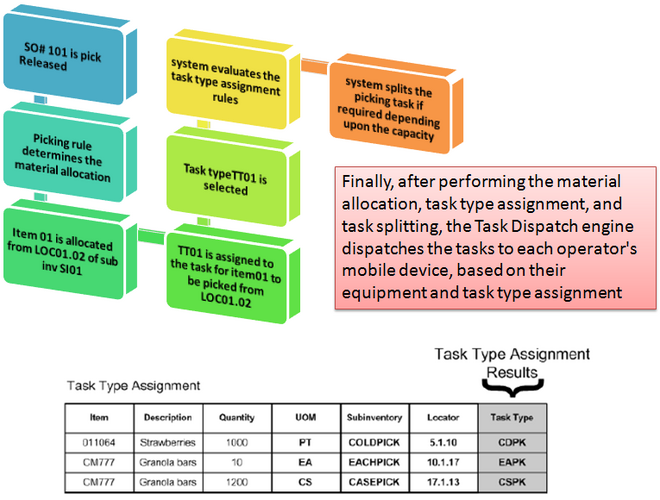 The above figure shows the picking task processes.
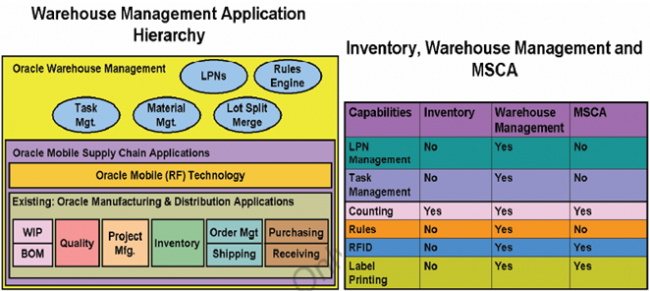
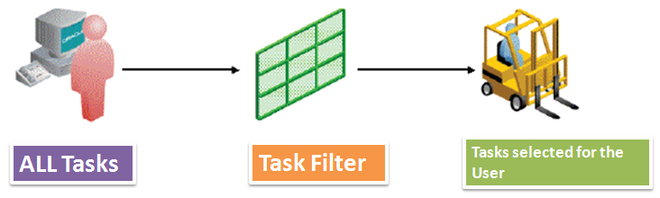
 Oracle Warehouse Management creates tasks such as picks, put away, moves, and replenishments and dispatches pending tasks on demand to mobile radio frequency devices.